Archive for Tutorials

How to Clean Your Drains Naturally With Bokashi Tea

Unclog your drains with Bokashi tea!

Bokashi tea is a wonderful, eco-friendly alternative to harsh chemical drain cleaners. Learn how to use this bokashi composting byproduct to safely and effectively get rid of annoying clogs in your plumbing.

How to Clean Your Drains Naturally With Bokashi Tea

Bokashi tea, also sometimes called bokashi leachate or bokashi juice, is the liquid that builds up at the bottom of a bokashi bucket. It is simply a byproduct of the fermentation process that happens inside the bokashi bucket. This byproduct doesn’t have to go to waste. In fact, it has a number of uses, including fertilizer, weedkiller, and even drain cleaner! This article will focus on how to use bokashi tea as a green, eco-friendly alternative to traditional harsh chemical drain cleaners.

If you aren’t familiar with bokashi composting or are interested in starting your own bokashi bin, check out my article: How to Set Up and Use a Bokashi Bucket for Indoor Composting

Read the rest…

How to Set up the Worm Factory 360 Vermicomposting System: Getting Started With Worm Composting

How to Set Up the Worm Factory 360

I’ve been using the Worm Factory 360 for about a year and a half now. I got it mainly to use as a means of reducing waste that I sent to the landfill. The resulting compost/worm castings are great for using in the garden and on flower beds. Since starting the Worm Factory, I’ve also started a regular compost pile in my back yard, and I’ve just started a “lasagna” compost bed where my garden is going to be next year. There is no reason to send kitchen scraps and yard waste to the landfill when you can use them to create excellent fertilizer for your lawn and garden. This article is about setting up the Worm Factory 360 to get started with vermicomposting.

The Worm Factory 360 vermicomposting system makes composting accessible, even to people with little space. Though initially setting up a worm bin may seem daunting, this system is easy to set up and maintain by following these simple guidelines.

How to Set up the Worm Factory 360 Vermicomposting System: Getting Started With Worm Composting

The worm factory 360 is a vermicomposting system consisting of stackable trays, which makes indoor vermicomposting easy for anyone, even people with little space. This stackable vermicomposting system makes it simple to create and harvest vermicompost in your home. With traditional one-compartment vermicomposting bins, it is difficult to sort the worms and in-process compost material from the finished compost material. With this stackable worm bin, the worms migrate upward toward new food materials, and away from the finished compost, making harvesting the finished vermicompost easy. This nutrient-rich organic compost can be used on house plants or in your garden. Because the system allows new trays to be stacked on top of each other, this system also takes up little space, allowing anyone to begin composting in their home. If properly set up and maintained, the Worm Factory 360 does not smell bad, even when kept indoors. Even people living in city apartments or houses in the suburbs can compost at home and reduce the amount of trash they are sending to the landfill using this method.

Read the rest on DenGarden.com

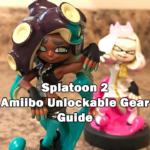
Splatoon 2 Amiibo Unlockable Gear Guide

Marina and Pearl Amiibo

This guide will show you how to use each Amiibo in Splatoon 2, and includes a reference guide for the gear obtained by each Splatoon Amiibo, including the newly released Off the Hook: Pearl and Marina Amiibo.

Splatoon 2 Amiibo Unlockable Gear Guide

All Splatoon and Splatoon 2 Amiibo can be used to unlock Amiibo-exclusive gear in Splatoon 2. The original Inkling Girl, Inking Boy, and Inkling Squid Amiibo from the first Splatoon game unlock the same gear in Splatoon 2 that they unlocked in the original Splatoon for Wii U, but now you do not need to complete challenges to unlock them. Callie and Marie from the original Splatoon Amiibo series also unlock exclusive gear in Splatoon 2. The Splatoon 2 Amiibo series includes a new version of the Inkling Girl, Inkling Boy, and Inkling Squid. The two new idols, Pearl and Marina, where also just released as Amiibo figures. These Amiibo unlock exclusive new gear as well. Each Amiibo unlocks three pieces of gear, including headgear, clothing, and shoes, all with special abilities. In addition to gear to customize the appearance of your Inkling or Octoling character, each Amiibo also unlocks a song to play at the Squid Beatz 2 arcade machine in Inkopolis Square.

This guide will tell you what gear is unlocked by each Amiibo, what abilities come with each piece of gear, what songs for Squid Beatz 2 are unlocked by each Amiibo, and how to unlock the gear from the Amiibos.

Read the rest on LevelSkip.com

Where to Find All Four Thangs in Splatoon 2: Octo Expansion

Where to find all 4 thangs in Splatoon 2: Octo Expansion

I wrote this guide for Splatoon 2: Octo Expansion to help people who just want to unlock the playable Octoling character as quickly as possible. Many players who purchased the expansion are more interested in being able to play as an Octoling in multiplayer than in the story mode. While I do enjoy the story modes in Splatoon and Splatoon 2, I did want to get my Octoling right off the bat. I will go back later to finish all of the levels and unlock the rest of the unlockable gear. For now, here is my guide to finding all four “Thangs” in the Octo Expansion so that you don’t have to spend too much time exploring all of the Deepsea Metro lines to find them.

Where to Find All Four Thangs in Splatoon 2: Octo Expansion

Octo Expansion is a new DLC expansion for Splatoon 2 on the Nintendo Switch. This expansion adds 80 new single-player stages to the game and allows the player to play as an Octoling character for the first time in this series. The story of the Octo Expansion follows an Octoling known as Agent 8, who awakens with no memories of her past or of her identity deep underground on a subway platform. With the help of Captain Cuttlefish, she must retrieve four objects known only as “Thangs,” which are hidden in various locations within the Deepsea Metro subway system, to help her to find her way to the surface. Once the expansion is completed, players can play as their own customizable Octoling character in the game’s multiplayer mode.

This guide will show you exactly where each of the four Thangs are located to help you to reach the surface much more quickly. The Thangs can be obtained in any order. For convenience, I have listed them in alphabetical order by the subway line where they can be found.

Read the rest on LevelSkip.com

How to Replace the Battery in Your Pokémon Go Plus

Even Detective Pikachu plays Pokemon Go

With all the new updates Niantic has recently added to Pokémon Go, many players who have long since abandoned the mobile game are returning to continue their quests to become the ultimate Pokémon master! Unfortunately, since it has been so long since most players have last used their Pokémon Go Plus, the battery in the device is likely to be dead. Fear not! It is incredibly easy to replace the battery in your Pokémon Go Plus as long as you know what battery you need and have a screwdriver handy. I have written an easy-to-follow instructional guide on how to replace the battery in your Pokémon Go Plus so you can quickly get back to catching Pokémon throughout your neighborhood.

How to Replace the Battery in Your Pokémon Go Plus

So your Pokémon Go Plus is dead, but you want to catch some Pokémon. Fear not! It is very easy to replace the battery in the Pokémon Go Plus by following these simple steps.

Niantic has recently released some major updates to the popular augmented reality mobile game Pokémon Go, including more interactivity with other players. Pokémon Go players now have the ability to add friends and send and receive gifts. Players can now also trade with nearby friends. The hope of a more robust trading feature allowing players to trade with faraway friends over the internet finally being added in the near future has also been renewed. With this major update, many Pokémon fans who have long grown bored of Pokémon Go are returning to the game in droves, taking to the streets once more to one day become the very best, like no one ever was.

If you are like me, you were probably excited to dust off your old Pokémon Go Plus device to venture out into the real world outside and begin collecting gifts from PokéStops to send to your friends in the game, only to find that the device’s battery has died since the last time you played. Fear not! It is super easy to replace the battery in your Pokémon Go Plus. You just have to have the right replacement battery and a screwdriver at hand.

Read the Tutorial on LevelSkip.com…

How to Make Pong in Flash with ActionScript 3.0

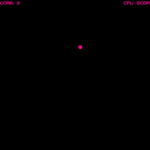
Pong by Jen Ný

Being completely new to Flash and ActionScript 3.0, I turned to online tutorials to learn some of the basics to make my own Pong game. I’ve never made an online tutorial before, but I wanted to help other people who are new to Flash learn how to expand on the tutorials I used to make a better Pong game (and learn more about ActionScript 3.0 and Flash in the process).

I started with a the Pong tutorial from AS3 Game Tutorials. That tutorial is a good start, but will only give you the basic functions of the game. You’ll need to do some more work to get something with all of the bells and whistles of a completed game (start button, ending screen, sound effects, etc.).

In addition to what was covered in the above tutorial, I wanted to give the player a way to win or lose, and have separate ending screens for winning and losing, a way to restart the game at the end, and, of course, sound effects. The following is assuming you have already followed all of the Pong tutorials from AS3 Game Tutorials and have a working Pong game.

Sound Effects

For the sound effects, you will need to import your sound file into Flash. To start, after you have the sounds you want to use, go to file -> import to library and select the sound file you want to use. Navigate to your library panel, right click on the sound file you just imported, and click properties. Make sure Export for ActionScript and Export in frame 1 are checked. Rename the class to something like sndBeep or whatever you want to call it.

Go back to the Actions window. Declare the variable for your sound at the top of your code with the rest of your variables using something like this:

var sndCollision:Sound = new sndBeep();

Where “sndCollision” is the variable name and “sndBeep” what you called your sound previously.

Now simply use code like:

sndCollision.play();

Wherever you want that particular sound to play (for example, every time the ball hits the paddles). Repeat these steps for each sound effect you’d like to include in your game.

I got my sound effects from SoundJay.com.

Start Button

I figured this one out from a forum post on AS2 Game Tutorials. First, simply create your start button (I used Photoshop, but you could just make one right in Flash), giving it an instance name such as btnStart, and place it in your game (it doesn’t matter if it is covering your game. We will hide it upon button click). Now go to the actions window and replace:

init();

with something like this:

btnStart.addEventListener(MouseEvent.CLICK, onClick);
function onClick(e:MouseEvent):void
{
btnStart.visible = false;
init();
}

Once the button is clicked, it will be hidden from the screen and the game will start.

End Screen

I also figured this one out from the same forum post as the start button, but I changed it up a bit. The instructions posted there have you simply making a score board to display when either the player or the computer gets to 5 points. I wanted separate screens to show whether the player won or lost, so I modified it a little bit (if you just want a scoreboard or one ending screen, follow the instructions in that forum post. The biggest difference is that I used two if statements, whereas the original poster used one).

First create two movieclip objects, one for winning (instance name winText) and one for losing (instance name loseText). I just used the words “You Win!” and “You Lose!” in the same font that I used for the scores. Place them so that they are overlapping each other, but not overlapping the start button (we will be reusing the start button to restart the game in the next section).

Reopen the actions window and add two if statements like these (one to check if the player won, and another to check if the computer won):

if(playerScore >= 5)
{
stage.removeEventListener(Event.ENTER_FRAME, loop);
winText.visible = true;
}

if(cpuScore >= 5)
{
stage.removeEventListener(Event.ENTER_FRAME, loop);
loseText.visible = true;
}

This stops the game and displays the win or lose text. But we’re not done yet! There’s no easy way for the player to restart the game and continue playing for hours and hours on end!

Restart Button
There might be better ways to include restart functionality to this game, but I couldn’t find any tutorials, and this was the best I could come up with after looking over the code with my limited experience in Flash and ActionScript 3.0. I basically just made the start button visible again, and reset the scores to 0 when the game ends.

To start with, add the following code inside both of the if statements we added in the last section, under where we made the win or lose text visible.
btnStart.visible = true;
cpuScore = 0;
playerScore = 0;

This makes the start button visible again and resets the scores. Now, go to the onClick function that we added when we made the start button. Add the following code:

winText.visible = false;
loseText.visible = false;
updateTextFields();

This will hide the win or lose text, and reset the score text fields to display zero again once the game is restarted.

I think that’s about it. I also added credit text with my name and website address to both ending screens the same way I added the winning text and losing text. You can play my finished Pong game here.

I hope someone found this helpful! As I said at the beginning of this post, I am a beginner at this myself. I’m also new to making tutorials, so if I accidentally left something out or wrote something wrong, let me know!